Getting started: registration
Before gaining access to your personal account "Contour", you must register in the program. To do this you need:
- Select one of the necessary services, they are on the official page of the program. Among them: “Extern”, “Elba”, “Documenter”, “FMS”, “Small Business”, “Diadoc”, “Accounting”, “Standard”, “OFD”, “Market”, “CA Cabinet”, “School”, “Crypto”, “Declarant”, “Alcohol Declaration”, “Hotel”, “Purchases”, “Expert”, “VAT+”, “Spectrum”.
- Fill out an application to connect the system. It indicates the region, contact person, telephone and mail address for communication, the name of the organization, its tax identification number and checkpoint.
- Monitor the status of the application and make amendments to the application if necessary.
Application and its status
Once the certificate has the status “Ready for release”, you can proceed to install it and further log into your personal account.
Installing a certificate and electronic signature
To use the system and LC “Kontura”, you must obtain an electronic certificate and signature. The latter can be requested only after an SMS “Your certificate is ready for issue!” is sent to the phone number specified in the application. Next, the algorithm of actions is as follows:
- In the Internet Explorer browser, you go to your personal account using the link
- Enter the phone number to which the account was linked in the required field.
- You receive a code for it - a password and enter it in the login form.
- On the page that appears, you will see a list of your applications for certificates and their status. Opposite the one you need, click on the “Issue certificate” button, the installation window will appear.
- You will be asked to re-check all the details of the organization and contact person; if everything is correct, you will be able to confirm your consent to issue an electronic signature.
- After this, you select the medium on which the information will be recorded, usually a flash card.
- Next, you will receive a repeated password on your phone; after entering it, the final stage of installing the certificate will begin. Upon completion, he is ready to work.
Certificate installed
Login to Extern:
Application statuses:
Services:
OK:
Certificate request:
Create a shortcut manually
1. Right-click on a free field of the desktop and select the menu “Create” > “Shortcut”.
2. In the “Specify the location of the object” field, enter the address:
for 32-bit operating system:
"%ProgramFiles%Internet Exploreriexplore.exe" https://auth.kontur.ru/?from=desktop&back=https://portal.kontur.ru/srvselector/index.ashx
for 64-bit operating system
"%ProgramFiles(x86)%Internet Exploreriexplore.exe" https://auth.kontur.ru/?from=desktop&back=https://portal.kontur.ru/srvselector/index.ashx
Click the “Next” button.
3. In the “Enter shortcut name” field, specify the name of the shortcut, for example “Contour.Extern”, and click on the “Finish” button.
4. A shortcut to login will appear on the desktop.
If it is necessary for the shortcut to be opened by another browser, then in step 2 you should indicate the path to the desired browser.
Thanks to Kontur services and their software, you can easily generate and send reports over the Internet, without being tied to a specific computer. Nowadays it is possible to work with Kontur.Extern through the online version, but this is not always convenient for some users, so they install special software and all the add-ons that come with it. Next, we will analyze the installation and configuration process in detail.
Login to your account
After registering and receiving a certificate, you can start working. Login to your account can be configured as you wish. Standardly, it is carried out through a certificate, that is, either a medium is connected to the computer, or login is carried out through the registry. In the latter case, you will only be able to log into your account from one verified computer.
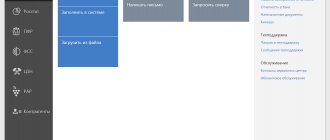
You will go to the official “Contour”, in the upper right corner select the “Login to services” tab, at first it will be done using a certificate.
Methods for logging into your personal account
After logging in for the first time, you can change your login settings in your profile. Specify the password and login that will be used for authorization. This method is convenient if you need to access from different devices.
By the way, if you have problems with authorization, you can contact the support service by calling the hotline, via Telegram, email or chat on the website. The staff provide fast service.
SKB Kontur is a domestic company that has been successfully operating for more than 30 years. Its activities are aimed at automating reporting. The company's product line includes several dozen services for electronic document management and online reporting, and ready-made solutions for trade, business activities, checking the reliability of partners, and solving other problems. To obtain up-to-date information and remote business management, SKB Kontur clients are invited to use their personal account rather than waste time visiting the office.
Install the Kontur.Extern program on your computer
The software in question functions with Internet resources, additional software and various plugins. For correct interaction of all components, you need to complete the installation and set the necessary parameters. All actions are performed in just a few steps. Let's look at them one by one.
Step 1: Download the software
As mentioned above, Kontur.Extern consists of several components, so their installation is carried out in different ways; we will briefly talk about the more complex ones, and we will analyze in detail the simplest and most effective:
- Go to the official website of the service.
- Click on the “Technical Support” button, which is located at the top right.
In the Settings section, navigate to the Software category.
The same principle applies to additional software.
At the top there is a “Set up your computer” button. Click on it to go to the utility download page, which will perform all the necessary actions automatically.
Use any convenient browser that is not written in the Chromium engine so that the configuration takes place directly in it. If this is not possible, click on the appropriate button to download the utility.
Step 2: Installing Components
Now let's look at the installation of the components itself. This process does not require specific knowledge or skills; all manipulations are carried out quickly:
- You have already launched the utility, now you can change the installation type. To do this, click on the appropriate button.
In the window that opens, select the assembly that you want to install on your PC. Before doing this, we recommend that you read information about them on the official website of the service.
Once you have chosen the version or if you do not want to change anything, click on “Next”.
Wait for the system scan to complete.
Now you need to install the necessary components; to do this, click on the special button.
You will be able to monitor the progress of the installation, observing which components have already been supplied and which are in the process.
When finished, you need to click on “Restart now” for the changes to take effect.
SKB Contour: login to your personal account
To enter your SKB Contour personal account, use one of the available options:
- Entering your personal name and password. For authorization, it is enough to provide the details;
- Using the certificate. You must first install special software or a plugin;
- Follow the link received in the email. The system will ask the user to indicate a valid e-mail, and then send a message to it with a link;
- Using the code from SMS. Having selected the appropriate authorization option in your personal account, enter your mobile phone number and wait for a text message containing a unique code.
To get to the authorization page, go to https://kontur.ru/, click on the “ Login to services ” link, and select “ Personal account ”. An alternative option is to go to https://auth.kontur.ru/?authmode=full&back=https://cabinet.kontur.ru/. If you encounter difficulties logging in, click the “ Help ” button under the authorization form and select the desired method of receiving advice.
How to install a personal certificate
There are two ways to install a personal certificate:
Installation via the “View certificates in container” menu
1. Select “Start” > “Control Panel” > “CryptoPro CSP”, go to the “Tools” tab and click on the “View certificates in the container” button.
2. In the window that opens, click the “Browse” button to select a container to view. After selecting the container, click on the “Ok” button.
3. In the window that opens, click the “Next” button.
4. In the next window, click on the “Install” button, and then answer affirmatively to the notification about replacing the certificate (if it appears). The certificate is installed.
5. If the “Install” button is missing, then in the “Certificate for viewing” window, click on the “Properties” button.
Registration of SKB Contour personal account
To register your SKB Contour personal account, you need to go to the web portal https://kontur.ru/, go to the authorization page and click “ Register ”. Next, the system will ask the visitor to upload photos of several documents:
- Russian passport (if the client is an individual entrepreneur);
- SNILS;
- Application for issuance of a certificate.
Review of the application takes 72 hours . After the specified period of time has expired, the applicant receives a notification about successful registration. If the photo of one or more documents turns out to be unreadable or of poor quality, the procedure will have to be repeated.
Recovering the password for your SKB Contour personal account
To recover the password for your SKB contour personal account, open the authorization page, select the “ By password ” login method and click “ Forgot your password ”. After this, a special form will appear on the screen in which you need to indicate the email address used to create your account. After some time, you will receive an email containing a link and detailed instructions on how to restore access to your personal account.
Before going through the procedure, make sure that the previously set password is entered correctly. Most often, problems with opening a personal account arise due to accidentally pressing the “CapsLk” button, changing the input language, or a simple error. If the listed reasons are excluded, solve the problem using the proposed method.
What are the types of electronic trading platforms?
All electronic trading platforms can be divided into several types:
- ETP for government orders
- ETP in a bankruptcy case
- ETP for the sale of seized property
- ETP for commercial enterprises and organizations
- Individual systems
- Information Systems
Electronic trading platforms for placing government orders
Electronic trading platforms for placing government orders are an Internet space for conducting electronic auctions and trades regulated by the Federal Law of the Russian Federation “On placing orders for the supply of goods, performance of work, provision of services for state and municipal needs.” Such sites were selected within the framework of a special procedure by the Ministry of Economic Development of the Russian Federation and the Federal Antimonopoly Service of the Russian Federation. Such ETP include: ZakazRF (zakazrf.ru), EETP (www.roseltorg.ru), RTS-tender (www.rts-tender.ru), Sberbank - AST (sberbank-ast.ru).
Electronic trading platforms for bankruptcy cases and sale of seized property
Separately, we should highlight auctions in bankruptcy cases and the sale of seized property, regulated by the Federal Laws “On Insolvency (Bankruptcy)” and “On Enforcement Proceedings”. On electronic platforms that carry out these auctions, property is sold, including real estate, securities, property rights and other valuables of bankrupt enterprises or debtor individuals.
Commercial electronic trading platforms
Commercial electronic trading platforms conduct auctions, as the name implies, for any Customers and Suppliers - commercial enterprises and organizations.
Mobile application SKB Contour
Through the SKB Kontur mobile application, the company's clients can manage their business from their smartphone screen, located anywhere in the world where there is access to the Internet. The program is designed for devices running on Android or iOS. To search and download software, launch the application store pre-installed on the system and search for the phrase “ Contour.Elba ”.
If everything is done correctly, the required application will appear at the top of the search results. It can be recognized by its corresponding name and company logo. To start using your mobile personal account, download it to your device memory and wait for the automatic installation to complete.
SKB Contour hotline phone number
By calling the SKB Contour hotline, current and future clients of the company will be able to receive detailed advice about services, as well as find out answers to their questions. A call center specialist will be happy to help you get rid of any difficulties that have arisen or explain how to work with your personal account.
To contact an SKB contour employee, dial 8 800 500 5080 and wait for the operator to respond. Among other things, you can use alternative ways to get advice:
- Sending an email to https://kontur.ru/spravka;
- Filling out the feedback form;
- Contacting online technical support;
- Publishing a message in the SKB Kontur group on the social network.
Among other things, the company’s clients can by going to the page https://kontur.ru/qa/new. Before creating a new topic, carefully study the information collected in the section. It is possible that the question you are interested in has already been asked before. To quickly find materials on a topic, use the search bar.
Variety of services available in your Kontur personal account
A wide variety of services are available in your Kontur personal account. It has everything you need to run your business comfortably and optimize the time spent on filing financial statements. Even changes in legislative requirements affecting companies working with cash have not gone unnoticed. In particular, we are talking about the mandatory maintenance of online cash registers, which will be automatically synchronized with regulatory authorities.
Taking this requirement into account, SKB Kontur specialists developed the Kontur OFD and Focus software, the main purpose of which was to ensure cash discipline for organizations. Numerous tests have proven that the new program has an optimal combination of functionality and can guarantee a reduction in wage costs due to the absence of the need to hire additional employees. When connecting to the basic tariff Kontur OFD, the user receives:
- Connecting one seller terminal to the operator’s remote service;
- Synchronization of information between the cash register and tax authorities;
- Monitoring the work of point-of-sale employees, constant monitoring of revenue;
- Creation of financial reports, support for sending checks by e-mail.
The developers of SKB Contour are doing everything possible to ensure that the offered software meets the requirements of current legislation, guaranteeing maximum accessibility and comfortable use to the end user. Thanks to this feature, the company has maintained good competitiveness for several decades.
How to check a counterparty in the Focus service
To check a counterparty in the Focus service, you must log in to your personal account and select the appropriate option. If you need to find out the business status of an organization, you will have to enter the exact name of the company or its tax number to get the desired result. The service allows you to almost instantly verify the reliability of the counterparty, since the request processing time rarely exceeds a couple of minutes. As for the results of the audit, they may contain details of the company being analyzed, information about the management team and founders, an extract from the tax service register and other materials.
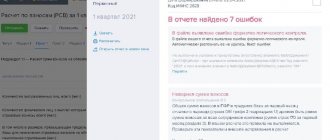
How to reduce the time for submitting reports to Kontur Extern
To reduce the time for submitting reports to Kontur Extern, it is enough to become an active user of the service and carefully study its functionality. Standard product options include automation of the company’s financial processes, control over the timely sending of data to the OFD Circuit and uploading documentation to the server of the supervisory authority.
By logging into your personal account, you can download, process and send data to various authorities. Without wasting time on visiting regulatory and supervisory authorities, the SKB Contour client can easily send a report to the Pension Fund, statistics agency, tax office, Rosprirodnadzor and other structures. The functionality of the service also allows you not to create separate accounts on the websites of the listed services, transferring the required information after standard authorization in your personal account.
Transfer of accounting to the cloud service Extern
Transferring accounting to the Extern cloud service allows you to significantly reduce the number of accountants, and, consequently, achieve significant financial savings. As soon as the user connects to the Kontur Accounting system, he has at his disposal an automated transaction recorder, and those actions that were previously performed by full-time employees will now be carried out automatically.
To achieve maximum efficiency, it is recommended to ensure integration not only with Kontur Accounting, but also with software (for example, 1C) used in the organization. As for the data backup, it can be placed in cloud storage. This will allow you to access the data at any time.
Accounting is easy with Kontur Elba
With Kontur Elba, accounting really becomes simple and clear. Its advantages will be especially appreciated by beginning businessmen who do not yet have qualified financial employees and do not physically have enough time to properly organize the work of all processes. By connecting to Kontur Elba and gaining access to their personal account, new users will be able to immediately use the service as a full-fledged accounting department, instead of hiring a separate employee.
It is also worth noting that Elbe Circuit does not require high-performance PCs to function successfully. Data processing is carried out on the provider's side. Among other things, the system works online, which means you don’t have to worry that a large amount of information will force you to purchase additional equipment or upgrade existing equipment.
Through your personal account, you can prepare and submit reports, keep records of materials and wages, and also solve other equally important tasks. The fact that the system works online allows the SKB Contour client not to worry about periodically calling specialists who will install program updates or configure software. For user convenience, a database backup is created automatically.
From simple to complex – Kontur Market
Contour Market is a unique service that allows you to automate most processes carried out by trading organizations. Among its main features are:
- Convenient and quick inventory of product balances;
- Control of payment by the buyer upon receipt;
- Tracking the route of movement of products to the final consumer;
- Integration with specialized services;
- Compatible with most accounting programs.
For a more detailed study of the service, we recommend visiting the page https://kontur.ru/market. Here you can also read the latest company news, learn about current promotions and place an order. If this occurs, we advise you to visit the “ Reference ” section, where detailed information on the offered product is collected.
Do you use your personal account?Always use62.04%Never use9.39%Not registered yet28.56%Votes: 5812Go to the end of the metadataGo to the beginning of the metadata
If it is necessary to replace one qualified certificate with another (in this case, the owner of the certificate does not change and the validity of the old CEP has not yet expired), then use the instructions Renewing a CEP certificate.
If an organization or individual receives a certificate for the first time or it is necessary to change the current certificate due to a change of manager, then do the following:
- Go to the service center. Service center staff will create a form for submitting your application.
- Log in to your personal account at https://i.kontur-ca.ru.
Click to expand instructions on how to log into your personal account. To log into your personal account to issue (renew) a certificate:
Go to i.kontur-ca.ru.
- Enter the phone number to which the login password will be sent and click on the “Get code” button.
- When you first receive your certificate, set up your workspace.
Click to expand instructions on how to set up a workplace. Administrator rights are required for setup and installation.
To configure and install all the necessary components on the workstation, do the following:
- Follow the link i.kontur.ru.
- If you are using an Internet browser other than Internet Explorer, install:
Extension.
Click to expand instructions on how to install the extension for Google Chrome
To install the extension:
Click on the "Download extensions" button.
- Click Install Extension.
Click Install.
Click to expand instructions on how to install the extension for Mozilla Firefox
To install the extension:
- Click on the "Download extension" button.
- Click Allow.
- Click Add.
- Click OK.
Click to expand instructions on how to install Diag.Plugin
To install Diag.Plugin, do the following:
- Click "Download Diag.Plugin".
You can also use custom installation of components (not recommended). To do this, click on the “Select components to install” link, mark the required components and click on the “Start installation” button.
When installing the system using a web disk, the default version of CryptoPro 4.0 is installed.
CryptoPro versions 2.0, 3.0 and 3.6 R2, R3 and R4, 3.9 R1 and R2 are no longer FSB certified, they are also not installed from the web disk. If necessary, distribution kits of any versions of CryptoPro can be downloaded from the developer’s website.
If CryptoPro version 2.0-3.X was installed on your computer, the system will offer to update it to version 4.0 R4.
WebDisk may prompt you to restart your computer or browser. To restart your computer, click on the “Restart now” button. To restart the browser, close all windows and reopen the Internet browser. Re-visit https://i.kontur.ru and repeat the steps.
To issue a certificate:
- In the “Check details” window, if the data in the certificate has not changed, select “I confirm my consent to issue an electronic signature certificate with the specified data” and click on the “Issue certificate” button.
If instead of the window for issuing a certificate, the message “Pay the bill” appears, then contact the service center at the place of connection. If the information is incorrect, click on the “edit application” link, make changes and resubmit the application for verification.
If the certificate was requested on a floppy disk, flash drive or in the registry, a password entry window will appear. It is recommended to leave it blank and click OK. If you lose your password, it will be impossible to recover it!
After the application is approved, open the certificate issue page in your personal account and install
- Once the certificate's public key has been issued, an Install Certificate button will appear. Click on it.
- If a password was specified when the certificate was issued, enter it and click “OK.” To avoid entering a password when using the certificate in the future, select the “Remember pin code” checkbox.
- The certificate is installed and ready to use.
For certificates that are issued for use in Contour services, it is possible to immediately make a copy of the certificate in case of loss or damage to the key media. And if the certificate is installed on your computer, a copy will allow you to work with the signature on another device.
—>
- No tags
Content:
To view information about current certificates, applications for signatures and order additional services, you must log in. To do this, just follow these simple steps:
- Open the official website of the Contour Certification Center.
- Enter the phone number that was specified when placing the application.
- Confirm your identity using the code from SMS.
Possible problems and how to solve them
Windows cannot verify the authenticity of the certificate
Most often, this error occurs in older versions of Windows OS. For example, if you are using Windows 7, you must update it to SP1 and import the certificate again.
Also, the developers of the Crypto Pro cryptographic complex themselves recommend using 64-bit systems.
This requirement is relevant for Windows 7 and subsequent systems. At the same time, Windows XP version SP3 was released only in the 32-bit version, but such a problem never arises in it.
In addition, this problem often occurs on Windows Vista (it was partially resolved in SP2).
Since Windows XP and Windows Vista are already seriously outdated and these operating systems are no longer supported, it is highly recommended to upgrade them to at least Windows 7.
Permissions error
Most often, this error occurs if the user from whom the CA certificate is imported does not have rights to perform this action.
Then you need to log into the computer under an administrator account. Or import using the “Run as administrator” option when clicking the mouse.
Import error
Windows may report an error when you try to add a certificate to the store.
It most often occurs for one of the following reasons:
- An old version of the crypto provider is installed - currently certificates are issued in accordance with GOST 2012, which requires a minimum version of Crypto Pro 4.0
- A copy of the public key of this certificate has already been installed in the system (you can check this by viewing the list of installed digital signatures through the Crypto Pro control panel;
- Windows cannot access the registry, or working with it ends in an error - it is advisable to check and restore the registry using Windows tools, or use third-party programs such as C&CLeaner.
- The CS of the certification authority that the user is trying to import has expired. You must obtain a new certificate with a valid period.
- The CA certificate file itself is damaged. You need to get a new copy and import again.
If the error still appears, then the problem may already be directly in the installed copy of Windows. In this situation, it is advisable to reinstall it.
Local CA certificate not found
This error most often occurs when working in a bank-client system. In this case, when establishing a connection between the bank server and the client computer, the bank sends it, but the client has nothing to check it with.
To solve this problem, you need to request the required certificate from the bank. Install it into the system and indicate that this is the CS of the Certification Authority.
Another case of this error is the installation on the client computer of a certificate of a different certification authority, and not the one with which the bank’s certificate was certified. In such a situation, it is necessary to request from the bank and install the correct CS in the system.[/penci_blockquote]
Registration of a personal account
To register on the website of the certification center, you need to find a suitable electronic signature based on the type of activity on the main page of the website, select the “Order” option and fill out the application.
Login or register
The list of required data includes:
- region, country and city;
- contact person, email, phone number;
- information about an individual entrepreneur or individual.
If the user has a completed profile on the SKB Kontur website, most of the data will be automatically pulled from the system.
After this, a company consultant will contact the applicant, clarify the details of the digital signature, and also register the profile with the certification center. Only with the help of an operator can you access your personal account
Why doesn't the digital signature certificate pass authentication?
When working with the public services portal, using a special plugin, the electronic signature is checked for qualification and validity, as well as the correct filling of all fields and forms. If during the verification process it is discovered that one of the required details is not filled in, then the port classifies the certificate as not qualified. Then a check is made to determine whether the CA has accreditation, the validity period and status of the certificate. If the certificate has expired or has been revoked, or if it was issued by a certification center without accreditation by the Ministry of Telecom and Mass Communications, then the verification will not be passed.
To obtain an electronic signature from SKB Kontur, you must fill out an application, pay a fee and collect the necessary documents. On average, the certificate is issued within 2-4 days after confirmation of payment. To work with props, you need a simple workplace setup, which includes installing a crypto provider and special plugins. Each of them is selected for a specific information system. SKB Kontur also offers its clients free opportunities for using digital signatures: a web disk and a web service for signing and verifying digital signatures. To use them you need to register on the official portal.
Apply for a certificate
Step-by-step instructions for ordering an electronic signature:
- Select the appropriate certificate on the certification authority website.
- Fill out an application through the Contour website.
- Wait for the application to be approved and pay the invoice.
- Collect the required documents and send them by registered mail to the customer service center or come in person to submit certificates.
- Obtain a signature certificate from a branch of the company.
Alternatively, users can directly contact consultants using the toll-free support line 8-800-500-05-08 and submit applications for digital signature.
Personal account features
In the Kontur certification center, users can access the following functions:
- Selecting and ordering a certificate - convenient selection of a key according to your needs. Users have access to filters such as trading under 44-FZ, 223-FZ, State Defense Orders, commercial and bankrupt. Additionally, electronic signatures are provided for working with government services, including Rosreestr, State Services and others.
- Managing existing keys - cancel the service, renew the certificate, order additional options.
Since the Kontur company is focused on electronic services, businesses and individuals can receive additional options when ordering an electronic signature.
To save all kinds of resources - space, paper, ink, time - an increasing number of software products are being introduced into the activities of enterprises.
One of the leading enterprises in this area is SKB Kontur.
Free services for using digital signatures
SKB Kontur also offers its clients free services for working with digital signatures. The first one is web drive. It allows you to automatically configure a workplace for using digital signatures, and has a built-in license from CIPF CryptoPro.
Another free service is Kontur.Crypto. With its help, you can sign any electronic document outside a specialized system (ETP, Extern, Diadoc), check any electronic signature created in any program for signing documents, encrypt and decrypt an electronic document.
About company
The Russian developer of programs for optimizing the activities of any company has been around for almost 30 years. Most small businesses use a product designed for submitting online accounting reports - Kontur-Extern.
In addition to it, there are more than a dozen products for accountants and managers that help optimize the internal work of the company, as well as simplify document flow with regulatory government agencies. Among the products of Kontur, we can highlight the following: Salary, Standard, Personnel.
Features of the program interface
A product that helps generate and send reports to the tax office, pension fund, Rosstat. To do this, you must have a computer with an Internet connection at hand. If available, you must gain access to your personal account. The convenience of using the resource means saving time and effort. Reports (like all other documents) are sent instantly. There is 24/7 access to the data, as the system operates 24 hours online.
How to log in to "LK"
To start working in your personal account, you need to go to the official website i.kontur.ca.ru.
A window will open in which you must enter the mobile phone number specified in the application form. Then click on the “Get code” button. After a couple of minutes, a one-time password arrives on your phone, which you need to enter. After authorization in your personal account, you should begin installing certificates.
User Installation Procedures
To start working in Kontur-Extern you need to install the system, this requires:
- A license that grants the right to use the CIPF “CryptoPro CSP” (This license is included in the digital signature certificate).
- Key carrier Rutoken.
The client receives all this when connecting to the Kontur-Extern system.
Installation instructions for “Kontur-Extern” consist of the following steps:
- System installation. Enter the address https://i.kontur.ru in the browser and agree to the pop-up window offer to install the AddToTrusted program.
- Click on the “Next” button and then click on the “Install” button.
- Request for digital signature. Without a qualified digital signature, working with the system is impossible. Its installation is carried out using the Rutoken key media and an Internet connection.
- Copying a key container. This stage allows you to protect the user in case of damage to the key media. A copy made in advance will allow you to work with the system as usual.
Certificate status "New"
Your personal account may contain several qualified certificates with different statuses at once.
If this is just the beginning of working with the resource, then you should click on the “New” button, then select “New Application” and fill out the form that appears.
In addition, according to available documents, to apply for a certificate you will need to upload an identification document of the certificate holder and SNILS.
The section containing organization data cannot be adjusted independently. Therefore, if any discrepancies are detected, you need to contact the service center. In this case, an indication of the presence of errors must be confirmed by official documents - the provision of their originals or copies certified by a notary.
If all the data is correct, you need to click on the “Download and print application” button. The printed document must be signed and stamped. It then needs to be scanned and uploaded. In addition, the owner’s passport and SNILS are loaded. When you click on the “Submit Application” button, the entire package of documents will be sent for further consideration.
After verification, which usually does not take more than 24 hours, you receive a message that the application has been reviewed.
The further procedure depends on which certificate was requested - cloud or regular. But first you will need to provide the service center with original documents sent electronically.